20:05


Welcome to Hot Thai Kitchen. Green curry is no question the most popular Thai curry around the world. But even in Thailand, you could argue that it is the most popular curry amongst Thai people. I mean, it is the one curry we eat with everything. With rice, with noodles, with roti, we put spaghetti in it. Heck, even KFC makes a green curry chicken rice bowl. So, if you want to experience a dish that is truly integral to Thai food culture, green curry is it. My green curry recipe has been my most popular one for years, but the video is over 10 years old, and I've learned a lot since then, and I have new tricks and tips to share. So, today I am bringing you a new and improved video
tutorial for this all-time favorite dish. So, even if you're familiar with my old one, stick around. You will learn something new and valuable. Let's get started. The heart of any Thai curry is in the curry paste or what we call prick gang. Now, if you have the time and the will to make your own curry paste from scratch, that's fantastic. I'll link to my recipe below. But the vast majority of us, myself included, are probably going to use some form of a store-bought curry paste, right? And there is nothing wrong with that. I want you to know that even Thai people in Thailand, most of us when we make it at home, we also use a store-bought curry paste. But I want to show you a few enhancements that you can
make to make the storebought paste even better. These are all optional, but recommended. First, you need to start out with a good brand of curry paste. More on this in a bit. Now, we're going to enhance our storebought paste with a few ingredients. First, I'm going to finely julian some Thai basil leaves and then pound that into a paste. And I add basil to boost the green color as most commercial paste turn out quite pale because they don't want to add too many green chilies which are mainly what makes a green curry green. You can of course add some extra green chilies instead if you like things a little extra spicy.
Next, my new secret is to add a little extra kachai. And I'm going to pound it into the paste as well. This is a herb that's commonly added to green curry in Thailand, but it's often omitted or used sparingly in commercial paste. So adding a little extra makes it special. Gashai comes fresh or brined in a jar, and both are fine to use. Finally, we're going to add fermented shrimp paste or capit, which will add a big boost of umami to the final dish. And then I'll add our green curry paste and just pound everything to mix together. Shrimp paste is always added to Thai curries in Thailand, but commercial paste often omitt it in order to keep it vegetarian. And there you have it. Hot Thai Kitchen's enhanced green curry paste. A
note on buying curry paste, and this is the most important thing I will say in this entire video, and that is the quality of your curry paste will make or break your curry. This is where 90% of the flavor of your curry is coming from. If you go with a bad brand of curry paste, it will result in a bad curry. Now, as you may know, my favorite brand of curry paste for years is Melo. Not sponsored, but of all the brands in the export market that are widely available, this is the most flavorful and it is one of the few that already contains shrimp paste. I still add the extra shrimp paste for that umami boost. But if you didn't have any to add or you didn't do any of the enhancements that I showed
you, you will still get good flavor out of it out of the package. Importantly, I will also say not to use Thai Kitchen, which I know for many of us is the brand that's most commonly available because it's the one sold in Western grocery stores. Thai kitchen is so incredibly weak that I don't recommend it unless you're cooking it for kids or somebody who cannot handle any spice whatsoever. If Melo is not available, I have a whole blog post and a taste test video where I review five of the most common brands of green curry paste on the market. And in the blog post, I'll also share tips on how you can judge a curry paste by its packaging when you go shopping. So, please before you go out to buy a curry
paste brand, check that out. I will link to it below. All right. Now that we have enhanced our paste, let's get cooking. We begin by bringing a portion of our coconut milk to a full boil. Then add the curry paste and then sauté that for a few minutes. Keep stirring so it doesn't stick and burn to the bottom. As the coconut milk reduces, eventually you might see the coconut oil starting to separate out from the paste and it'll float to the top. Just like that. That is perfect. That means the paste is now frying in the coconut oil, which is what we want.
Once that happens, let it go for another minute or so. And then stir in our chicken thigh, which I have cut into bite-sized pieces. And yes, I do recommend thighs, but if you want to use breast, stay tuned for important tips. Once the chicken is mixed well with the paste, we can add the rest of our coconut milk, some good chicken stock. And then we're going to season our curry sauce with some palm sugar and fish sauce. And you want to season it early so the chicken can absorb all that seasoning as it cooks. I'm also going to add in some makroot lime leaves which I will twist to bruise to release the aroma and then tear into chunks discarding the center stem. We're going to let this simmer for about 10 minutes
or until the chicken is fork tender. Two things while our chicken is simmering. If when you are sautéing the curry paste, the coconut oil never separates and your curry paste is super thick, it's been reduced so far, don't worry. Just proceed with the recipe. it'll be fine. Some brands of coconut milk have been processed to prevent separation because most of the time you don't want the coconut oil to separate, right? Except when you're making Thai curry the traditional way, in which case it's more of a feature than a bug. But if you are using the coconut milk that I recommend, which is already in the carton, as I've talked about many times before, it
should separate. Thing number two, the reason why I highly recommend using chicken thighs over breast is because chicken thighs would tenderize beautifully during the simmering time that it is doing right now. This simmering time not only makes the chicken taste better because it has time to absorb the curry flavor as it cooks, it also makes the curry taste better because the chicken will exude much of its juices into the curry broth. If you try to simmer chicken breast, which is very lean, for a long time, you'll just end up with like an overcooked texture and it's just not as good. If you insist on breast, what you will do instead is cut the chicken into bite-sized pieces and then marinate it first in some fish
sauce so it can have some flavor and then add it at the very end and let it cook for just a couple minutes until it's done. For those of you who are cooking with a particular brand of curry paste for the first time, there's this one additional step that I would like you to do, and that is once the chicken's been in there for a few minutes, it's no longer raw. I want you to taste the sauce and determine if you need to add more curry paste to it. Because, as I said, some curry paste brands are very weak and you will need more than what my recipe calls for. So, taste the sauce and if you think that it's bland or it's not spicy enough, then you need to add more paste. But I'm not talking about salt, okay? Do not be tasting for salt
because if it just lacks salt, we can add fish sauce. What you're tasting for is it aromatic and flavorful? Does it need more of the herbs and spices? And if you determine that it does, don't scoop raw curry paste and dump it in. You'll need to cook it first. So, what you'll do is you take the additional amount of curry paste, sauté it just in some neutral oil. This is fine. Cook it for a few minutes and then dissolve it with a little bit of coconut milk or chicken stock or even water just so it's not going to go into your curry as a big lump and then pour it into the curry. And then next time you'll just know that you'll need to use more of the paste from the get- go. All right. Now, let's
talk vegetables. Technically, you can add whatever kind of vegetables that you want into your green curry, but in Thailand, we only add a few different types. Namely, Thai eggplant, which I absolutely love. Bamboo shoots, which you can get in a can. And this is the one that I used in my previous video because overseas it is the most widely available. And winter melon, which I also love, and this is the version that I have in my book, Sabai. Today, I'm going to use Thai eggplant, which is actually the most common version in Thailand. And they're actually very easy to prepare. All you have to do is cut off the stem and then cut each eggplant into bite-sized pieces. This could be
four, six, eight, 12. It really depends on how big or small the eggplant is because the size of Thai eggplant varies a lot. So, you'll just have to use your judgment. But you want each piece to be something like this. After cutting, if you're not using them right away, put them in a bowl of water as they can turn brown if exposed to air for a long time. Aside from that, we also have some red and orange peppers for some color. Any kind will do here. And then some Thai basil. And that is it. Let's finish our curry. Once the chicken is tender, add the eggplant. But stay here for the first minute or so. And keep stirring and pushing the eggplant into the curry. Because if they're left to float at the
top, the part that's exposed to air before it's had a chance to cook will actually turn brown. After the first minute or so, the exterior is cooked. you're good to leave them floating. The eggplant only takes about 2 to 3 minutes total to cook and they can overcook. So once the fork goes through with slight resistance, you can turn off the heat. And then right [snorts] away, I'm going to stir in my peppers and let the residual heat gently cook them cuz I do want them to stay crisp. And then finish it off with the Thai basil, which will also just wilt from the residual heat. And it's done.
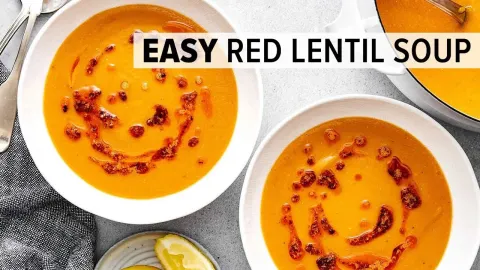
Look how beautiful that is. Now, before you serve, the most important thing is you need to taste and adjust the seasoning. We're looking now for saltiness. And this is so important because every brand of curry paste will vary quite significantly in how salty it is. And then whether or not you added shrimp paste to your paste, all that will affect how salty your curry is and how much fish sauce you need to add. So, taste. M. Oh, that's so good. But I do need to add a little bit more fish sauce. Just a touch. Let's eat. I am so excited about this.
Now, as I said, I'm having it with rice the classic way, but green curry is the one curry that we eat with other things. We eat it commonly with komdin, which is rice vermicelli. um more on the type of noodles and how to cook it in the blog post. So, definitely check that out. We also commonly uh eat it with roti. Uh we call it roti in Thai, but it's roti patha, the flaky, oily fry type. That's really good, too. We also put uh spaghetti into it. Like, you can like use this as your pasta sauce and cook your pasta. I mean, like there's so many ways to eat it. Um so, feel free to experiment. But for
now, let us try the classic version. Oh, by the way, lime leaves for infusion purposes only. Don't eat them. It is no question why this is the most popular Thai curry around the world. It is just so incredibly delicious. And I really encourage you to do all the little steps that I suggested. The enhancements of the curry paste if you can get the ingredients, the checking of the sauce strength and adding curry paste um to make sure that it's flavorful. I mean, all those might seem like tedious little steps in between, but I can promise you it is totally worth the effort and it makes a big difference to the end product.
I can make a really quick like dirty and quick version of a green curry and do nothing to it and it'll be fine. It'll be good. But if you do all those little things, it will be epic. So, the recipe as always will be on hot thaiikitchen.com. A special thanks to all of our Patreon members who help support the show. If you want to know what that's all about and how you can get bonus content and have access to our private Discord server, check out the link in the description below. Thank you as always for watching and I will see you next time.
Gettsly is free, without subscription fees or ads, and available to everyone. Your support helps us keep the service online, improve its features, and continue providing useful video tools.