31:51
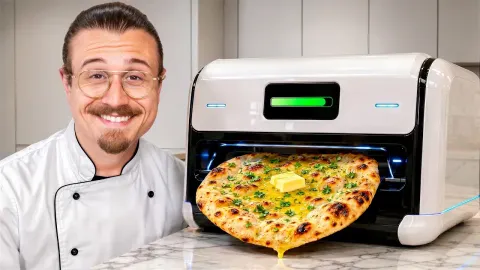


Hi everyone, I'm Claire Sappitz. Welcome to my home kitchen. Today I have another recipe that you can find on New York Times Cooking. As you know, I'm a contributor. And today I have a recipe for a lemon basque cheesecake. This is probably the easiest cheesecake you're going to make and in many ways is like the exact opposite of New York cheesecake except for what they have in common is like a ton of cream cheese. But it's weirdly easy to make and so delicious and like very special. And I'm very excited to show it to you. Dessert This dessert was invented in San Sebastian, Spain in the Basque country at a restaurant called Lavvenia. The chef needed a dessert that he could bake
in the ovens in the restaurant, but the ovens baked super hot. And so he developed this recipe. In some ways, it's the opposite of a New York style cheesecake because New York style cheesecake is baked in a water bath at like a relatively low temp, like low and slow. So it has this really even dness all the way through. Bash cheesecake has the opposite method. It goes into the oven, no water bath, super hot, hot oven, short bake, and like the top gets really dark and the center stays medium rare. That's the ideal dness. And then there is one quick thing that I've added to the recipe, which is to broil it in case your cheesecake doesn't get that really dark caramelized surface during
the bake time. By the way, this is a lemon version. So, if you took out all the lemon here, you could just make like a plain cheesecake and like add a little vanilla, but we're kind of playing up the creamy flavors with like bright citrusy lemon zest and juice. For the cheesecake, and again, there's a lemon version. I have 1 and 3/4 pounds, that's three and a half packets of Philly cream cheese, like block style cream cheese. Then I'm using 8 oz of mascar pone. A lot of recipes for best cheesecake just call for like all cream cheese, but it's so much cream cheese. And I like the different slightly savory cheesy flavor you get from the mascar pon. It just cuts it a little bit so that you're not just like feel like
you're spooning straight cream cheese. A little bit of flour, just 1/4 cup. The little bit of flour is really stabilizing and it helps to prevent weeping, which can sometimes happen. I have three lemons. I'm going to use the zest and the juice. A little vanilla extract, some salt. I have six large eggs at room temp. By the way, everything is room temp. That's really important. Some granulated sugar, a cup of heavy cream, and that's really it. Special equipment. I'm using a food processor for this batter. Often you'll see stand mixer instructions, but I like the food processor because it makes sure that there's no lumps. I think it's actually easier to eliminate
lumps in the food processor than in the stand mixer. And you don't really want to work air into the batter anyway. So, to me, this is just like the quickest, easiest, most foolproof way of doing it. But be warned that you're going to max out your food processor minus 14 cup bowl. you cannot make it anything smaller than this because it's like right up there at the top. So, just be advised if you don't have a food processor that has this capacity stand mixer with a paddle, some parchment paper. You will need a high-sided round 9 in pan. You can make a best cheesecake in any size or dimensions. This is for a 9 in. This is the amount of batter that you'll be making. This has a removable bottom, which you don't have to have.
It does make it easier to unmold it, but you need really high sides. That's important. This might seem excessive for like a cake that is in so many ways simple. But I use a thermometer to tell if the cake is done. And that's important because if I were like a pastry chef in a restaurant and I could dial in my bass cheesecake, I wouldn't need a thermometer to know if it was done. It's like I can tell from looking at it and jiggling it and like seeing how much browning is on the surface. I could dial it in. But in my oven and your oven and like everyone's ovens at home, I could not tell you when it's done, you're gonna have to temp it. Like that's really the only way to be sure. And that's because we're going for this
like medium rare center. And that happens. That's about how hot the eggs are internally. And so that's why the thermometer is necessary. So you are going to want Do you have to use it? Like no. You could just kind of like look at it and like see the time, but this is going to really help you get like professional level results. So, the first thing you're going want to do is prepare your pan and preheat your oven. So, my oven is I set it to 450. So, I'm going to prep the pan. I have two pieces of parchment paper. We're going to press them into our pan perpendicularly. But I found that one thing that will help for the parchment to kind of hold
its shape inside the pan is to crumple it up first. So going to just ball it up. Now this one, at first I was doing it and I was like really smoothing it in there and it just wasn't like, you know, we're making these big folds and it was just a little bit harder to unmold the cake that way. Okay. So, we're going to flatten these back out. We're going to arrange them like in a cross perpendicular to one another. Center them over your cake pan and press down into the center. By the way, with my oven, like I said, 450, I have an oven rack in the upper third. Generally with bass cheesecake because we want that browning on the surface. You want
to bake toward the top of the oven, not like right under it. But that's why I'm doing the upper third cuz we want that like direct heat radiating down onto the top of the batter. I'm just pressing down on the folds, pinching them, and smoothing them. I found in all of my tests, you know, my half a dozen tests or so, that every single time I wanted more color on the surface of the cake. Your oven might be different. You might bake this, pull it out at the right dness, and the top is going to be really dark and brown. It did not get that in my oven. So, there's a step that's kind of optional. It's optional and or like
possibly not needed in, you know, other ovens, but like in my oven, I added the step for broiling to get the look that I wanted, that caramelized, really dark top. But if you broil parchment, it can catch on fire. So, there's an extra step in here, which is to trim your parchment to like no more than a half inch above your cake pan. Like this little corner under a broiler. That's no good. So, I'm just going to take a pair of scissors and trim. Now, it's only under the broiler for maximum like 1 to 2 minutes, so don't worry. Just as a precaution. So, this is our prepared pan. I'm going to set it aside. We're going to start to put together our batter. I'm going to take the zest off of three lemons.
When I the first time I tested this recipe, I was like, "Oh, what if you make like a whole citrus cake, but it's best cheesecake." And so, I boiled poked holes in a lemon, boiled whole lemon, and like pureeed in the food processor into the batter. And I actually really liked it, but it gave me little bits of lemon, which I also kind of liked, but I was like, I think the point of bash cheesecake, or one of the points is that it's smooth. And I also didn't feel like it was it added 20 minutes to the recipe cuz you to boil the lemon. And I didn't feel like it added more flavor than just zest and juice on its own. So that's where I landed with this. You could absolutely mix up the citrus. You could do orange,
you could do lime, you could do yuzu would be like so delicious and interesting. But basically, it's it's a lot of zest. Now, I'm adding zest and juice. If you don't want this to be a citrus flavored cheesecake, you can omit it, but replace the quantity of juice with heavy cream, basically. So you can modify this and adapt it, but it is a phenomenal canvas. Like this is a dessert of it's like all dairy and eggs. And so if you want to serve it with seasonal fruit, that's perfect. It's delicious with like any kind of merated stone fruit or berries on top or in the middle?
No, on top like serve served alongside. These are large lemons, so it's going to be very lemony. Doesn't really matter. You could do more or less if you prefer, but I was like, if we're calling it lemon bass cheesecake, I it should really taste like lemon. Harris told me that it was like a little too much, but I disagreed. Okay, so this is going to go into the food processor. And to this, I'm going to add my sugar and my salt. This, by the way, this is an additional tablespoon of sugar that I've separated out from the recipe because I make like a little lemon glaze at the end. And so, I'm set going to set this aside for the lemon, the lemon glaze.
All right, we're going to process this. Another reason why I like the food processor for this particular version of bass cheesecake is because I'm adding the zest. This is going to break it up into finer pieces so that you're not getting like distinct little shreds of peel in your cheesecake to keep it as smooth as possible. So, I'm going to turn this on and process until the sugar looks like wet sand. That part doesn't take long. While this is going, I'm going to juice my lemons. So, I need 7 tablespoons of juice. All right. So, you can see here's my sugar. Going to give it a little scrape. Now I'm going to add my mascaron cheese and my cream cheese. But my cream cheese I'm going to cut up into pieces.
Again, room temperature. You really want everything to be room temperature. Room temperature is just going to ensure that you have no lumps. Even though the food processor really takes care of it. This is all my cream cheese cut up into pieces. So, that's just going to help to prevent lumps because when I was testing the recipe, I just threw the big pieces in whole and they sometimes you get like one piece that doesn't quite incorporate and like one just like one lump. So, you don't want that. So, now we're going to process this and we want to process it until the sugar is dissolved. And that's going to take 30 seconds or so, but we'll test it by rubbing a little between your
fingers. And if there's grit, then keep processing. I'm going to crack my eggs. Six large So, let me just give this a little test. Okay, it's smooth. So, I'm going to scrape down the sides. Now, we're going to stream in all of the liquid ingredients, basically. So, I'm going to add my eggs, followed by my heavy cream, followed by my lemon juice, but I'm going to do six tablespoons of lemon juice. So, I'll have one left over for the glaze. Okay, you can see my liquid level. I'm like, full disclosure, I am above the max fill line for liquid, but it's not hot. Like, it's fine. But now, we're going to add our flour. If you don't have a 14 cup
food processor or larger, do everything with the paddle in your stand mixer. So, the flour is going to go in. This is just a 1/4 cup. And the 1/4 cup flour, it's there to stabilize. It prevents weeping. It's like there's a lot of liquid in here and a lot of sugar. And that will pull moisture out. That's it. That's the whole batter. This is my 1 tbsp of leftover lemon juice. So, I'm going to set this next to my little sugar for when the cake is done. But now, we're going to get this. I'm going to give it one quick scrape just to make sure there's nothing that's unincorporated. All right. A quick process again.
Okay. Now, I'm going to pour it into my prepared pan and into the oven. You'll have some air bubbles. It doesn't really matter, but you can kind of pop them on the surface. Don't worry about the folds and the parchment. It's kind of part of the whole look of the final cheesecake. Now, like I said, if you want, you can kind of pop some of these air bubbles. Now into the oven again on that rack that's in the upper third. And we are going to bake this until the surface is starting to take on a little color and is set, but it's still very jiggly underneath. So I think the language I use in the recipe is like it
looks like a water bed kind of moving. That's when we're going to start to take the temp and make sure that we're getting it out of the oven before it gets overcooked. The final temp is somewhere between 140 and 150. Because the oven is so hot, it's really hard to get like a super precise temperature. I'm not going to say like take it out at 145, but that range of 140 to 150 will give you good results kind of any no matter where you are in that range. Once you get 160, you're you're overcooked. Unfortunately, that happened to me. Oh, so that'll take that first temperature check after you start to see some browning on the surface and it's looking kind of set. That's at like the
30 to 35 minute mark. And then depending on your temperature read, it could go another 5 to 10 after that. So we'll check it in about a half an hour. So right at the 35 minute mark, I was starting to get very light browning on the surface. And when I picked it up, when I like slid it out of the oven, the top was set, but it was like incredibly like liquid underneath. I tempted it. It was in the high30s. It's been back in the oven for like 3 minutes. I'm I'm sure that it's done. So, I'm gonna pull it out. I'll show you what it looks like. So, the ow. So, this is what it looks like. It's puffed and risen, but it's like has none of that color on it that we want. It is so liquidy under the surface, but carryover
is significant with bass cheesecake. That's why I can temp it between 140 and 150 and it's still going to be set when it cools. So, let's see the temp. So, I'm at like 144. That's a great doneness. It's going to be super creamy in the center. I'm going to let this hang out, but we're going to broil it. So, the idea is I'm taking it out of the oven. It's having a chance to like cool a little bit while I preheat the broiler. So, let me get that broiler on. I'm going to preheat it for a few minutes. See, in my oven at 450, even in the upper third, like barely any color on the surface, but it's done. I don't want it to cook anymore internally. But your oven, like it might be really dark, so
you might be able to skip the broil step or maybe it has like sometimes it colors unevenly. You can leave it. That's fine. You could leave it like this if you wanted to. It'll taste delicious. But I love the little bit of texture contrast and the flavor contrast that you get from like a very, very well browned surface. And the idea is that I'm not turning on the broiler while this is still in the oven because then it's going to overcook in that amount of time. So, I'm taking it out, letting the broiler preheat, and sticking it back under. And it's going to continue to
settle like this over time. You want to do, I think, really ideally like a minimum 12-hour chill. Overnight is best. All right, I'm going to stick it back in. Oh, by the way, watch it like a hawk. Forgot to say that. Do not walk away. Watch it carefully. The difference between like very deeply caramelized and burned is seconds. Can already smell it. Yeah. So, another maybe another 10 seconds. Not even. No, I don't mind that like uh ombre difference. Yeah.
All right, we're done. Okay, but actually one final step. I'm going to bring it back over here, which is our glaze. Okay, so like less than a minute under the broiler. The last step is a little glaze. So, here I have my remaining tablespoon of sugar and my remaining tablespoon of lemon juice. I'm stirring them together. This is a teeny bowl. This is too small. But want to just stir with the pastry brush to dissolve the sugar a little bit. And I like this cuz it creates a nice shine on the surface. And of course, it's adding a little bit of lemon flavor. So, you're just going to kind of gently brush this across the surface. And you can see how it's like so liquid underneath. That is going to fully set
in the fridge. So now we have that lemon glaze on there. There's still steam coming off of this. It's super hot. I'm going to let this cool at room temp until it's cool enough that I can touch the sides. Like it's not screaming hot. It'll just be warm to the touch and then into the fridge where it needs to fully cool and set. So that's minimum 12 hours. I have a swap that I made last night. So I'm going to pull that one out and we're going to slice it and we're going to look at the texture. So, this is a cheesecake I made last night, and then I stuck it in the fridge. This one, I popped it out of the pan already cuz I only had one pan, so I had to use it for the one I just made. But this is what it looks like. The
parchment makes it very easy to unmold. So, now I'm just going to fold down the parchment. A little bit of it came away right there. You can taste it. But like, look at the surface. if you have like this little corner got folded in there, but it really comes off pretty easily. So, now we have our cheesecake. It's set. It's easier to slice cold, but the texture is best room temp. So, you can go ahead and slice it in advance, but you want to use a hot knife. So, just warming it up in some water, and it slices through really easily. And then, it's a little tedious, but you want to go ahead and like rewarm and wipe between cuts. So, the texture that I'm going to show you, this is the texture that's cold,
which is not really, like I just said, the best way to evaluate it. Once it warms up a little bit and reaches room temp, it becomes softer and creamier. So, I'm going to lift out the slice. See how at the edge the texture is a little fluffier and firmer, and then as you get toward the center, it's like super soft. That's what you want. So, this one last night I pulled it at pretty much the same temp. It was like mid-40s. So, I just want to show you what that texture looks like. It'll be even softer as it warms up a little bit out of the fridge. I'm going to taste it.
Actually really like it cold. Super lemony but not like puckering. So creamy. And I really like the different textures. It in that way it's the opposite of New York. It's like New York is a uniform texture throughout. This has like the soft center, the more set edge. You get the contrast. Like you don't want any color on a New York cheesecake. This you get the contrast with the kind of caramelized top and it's easier to make. Like no water bath. It's It's genius. Truly. Just get a good instant re thermometer and you're going to have such a good result. It's really fun to make. I love bringing these recipes to you via NT cooking. You can go to the link below for the recipe. No payw wall. Anyone can
access it. Want to say thank you so much for watching and don't forget to like and subscribe.
Gettsly is free, without subscription fees or ads, and available to everyone. Your support helps us keep the service online, improve its features, and continue providing useful video tools.